Thursday, May 29, 2025

English Toffee & Coffee Milk Shakes (A Grownup Milkshake)

This is a delicious milkshake for breakfast,
brunch or an afternoon pick-me-up!

Ingredients:

2 cups vanilla ice cream*

1/3 cup milk or caramel protein drink

1 1/3 cups chilled brewed coffee

2 teaspoons instant espresso or coffee powder

1/3 Heath toffee "brickle bits"**

1/3 cup whipped cream

2 teaspoons Torani caramel syrup topping

2 - 3 cups ice cubes***

Optional Garnishes:

whipped cream

Torani dark syrup topping

Torani caramel syrup topping

teaspoons toffee bits

Method:

Add all of the ingredients to a blender container. Blend until combined and smooth.

Divide between two large glasses or 4 small glasses. If desired, top with a small dollop of whipped cream, a drizzle of chocolate syrup, a drizzle of caramel syrup and one or two teaspoons of toffee bits sprinkled on top. 

Add straws and serve right away. Makes two to four servings.

*For a stronger coffee flavor, coffee ice cream may be used.

**I found Heath toffee brickle bits in the baking aisle with the chocolate chips. Chocolate covered toffee bits, or finely crushed Skor or Heath candy bars may be used.

***For a thinner shake use 2 cups of ice. For a thicker shake, use 3 cups of ice.

Note: Delicious & creamy, but no caffeine for young kids, please. 😃

Wednesday, May 28, 2025

Simple & Savory Salisbury Steak (Low Carb & Keto Friendly)

This is a simple & tasty way to elevate
hamburger meat.

Ingredients:
1 pound lean ground beef
1/2 cup finely grated parmesan cheese
3/4 teaspoon salt
1/2 teaspoon pepper
1/2 cup heavy cream
4 tablespoons butter
8 ounces sliced mushrooms
1 cup beef broth
1 tablespoon tomato paste
1 teaspoon arrowroot**
1/4 cup red wine

Method:
Add the beef, cream, cheese, 1/2 teaspoon of the salt and pepper to a large bowl. Use a large fork to thoroughly mix the ingredients until they are thoroughly combined. Form 4 patties from the mixture.
Melt two tablespoons of the butter in a skillet over medium high heat. Add the patties to the skillet and cook for 5 minutes on each side until browned.
Remove the browned patties and transfer to a plate.
Wipe clean the skillet, or in a new skillet, melt the remaining two tablespoons over medium heat.  Add the mushrooms and the remaining 1/4 teaspoon of salt. Saute until the mushrooms release all of their liquid and it mostly evaporates.
Whisk together the broth, tomato paste and arrowroot. Add to the mushrooms. Stir and add the wine. Bring to a simmer (low boil). Return the browned patties to the skillet. Cover and cook at low heat for 10 to 15 minutes. 
Transfer the patties to 4 plates. Top each pattie with 1/4 of the mushromms and 2 or 3 tablespoons of the sauce. 

**You can find the arrowroot among the spices at the grocery store. It is a plant based, gluten free thickening agent.

Notes:
For a low carb meal, serve with cauliflower rice, vetables or a salad.

If you are not following a low carb meal plan, serve with mashed potatoes and vegetables.

Nutritional info per pattie, approximately: 526 calories ~ 38.6 grams fat ~ 5.6 grams carbs ~ 1.5 grams fiber ~ 4 grams net carbs ~ 37 grams protein

Tuesday, May 27, 2025

Savory Chicken & Cauliflower Rice One Skillet Meal (Keto & Low Carb)

This is a delicious, flavorful &
simple one skillet meal! 

 Ingredients:

4 large chicken thighs, bone in (about 2 pounds)

1/2 teaspoon salt 

1/2 teaspoon pepper

1/2 cup finely grated parmesan cheese

1 teaspoon smoked paprika

1 teaspoon Italian seasoning

2 tablespoons butter

16 ounces riced cauliflower

1 cup chopped white or yellow onion

3 cloves garlic, minced

1/4 cup chopped cilantro leaves

1 tablespoon lemon zest

2 tablespoons lemon juice

1/4 teaspoon crushed red pepper (optional)

Method:

Remove the skin from the chicken thighs. Rinse and pat dry. Season both sides with salt and pepper.

Mix 1/4 cup of the cheese, the paprika and Italian seasoning on a plate or in pie pan. Press the top side of each thigh into the cheese mixture.

Melt the butter in a large skillet over medium to medium/high heat. Add the chicken (cheese side up). Cook until both sides are golden brown and the chicken is cooked through. Remove the chicken from the pan and set aside.

Add the garlic and onion to the skillet and saute for one minute or until translucent. Stir in the cauliflower. Cook and stir for a coiple of minutes.

Stir in the cilantro, lemon zest and remaining 1/4 cup of cheese. Cook for a couple of minutes. Add the lemon juice and if desired, the crushed red pepper. Stir well to combine.

Return the chicken to the pan. Cover and cook on low heat for 10 minutes.

Divide the cauliflower and chicken evenly between 4 plates. Makes 4 servings.

Nutritional info per serving, approximately: 526.65 calories ~ 26.8 grams fat ~ 13.9 grams carbs ~ 3.75 grams fiber ~ 10.15 grams net carbs ~ 62 grams protein


Monday, May 26, 2025

Apple Pie Oatmeal Cookie Cups

This dessert is a delicious combination
of an oatmeal cookie and apple pie!

Cookie Ingredients:

butter for greasing

3/4 cup ( 1 1/2 sticks) unsalted butter, at room temperature

1 cup brown sugar

1/2 cup granulated sugar

2 eggs

1 teaspoon pure vanilla extract

1 1/4 cups flour

1 teaspoon baking powder

1 teaspoon cinnamon

1/2 teaspoon salt

1 3/4 cups oats

Filling Ingredients:

4 Honeycrisp or Fuji apples

2 tablespoons butter

1/4 cup sugar

1/2 teaspoon cinnamon

1/2 teaspoon nutmeg

1 1/2 teaspoons cornstarch

Optional Garnishes:

caramel sauce

whipped cream

vanilla ice cream

Method:

Preheat oven to 350*. Use a small amount of butter to grease the inside of 12 standard muffin cups. (I recommend a silicone muffin pan.)

In a large mixing bowl, beat the butter and sugars until they are light and fluffy. Beat in the eggs and vanilla.

Sift together the flour, baking powder, cinnamon and salt. Add to the creamed ingredients and mix in. Stir in the oats.

Divide the dough evenly between the greased muffin cups. Press flat. Bake for 25 minutes or until the tops are golden brown. When the cookies finish baking, make an indentation to form a cup. (I used a small glass slightly bigger than a shot glass.)

While the cookies are baking, begin to prepare the filling. Peel, core and dice the apples. In a large saucepan, over medium heat, melt the butter. Add the apples and cook until the apples soften. Add the sugar, cinnamon, nutmeg and cornstarch. Cook and stir until the apples are thickened and carmelized.

Allow the cookie cups to cool for at least 30 minutes. Carefully loosen and remove from the muffin pans. Divide the filling evenly between the cookie cups. If desired, drizzle with a small amount of caramel syrup. For a special treat, top with whipped cream or a small scoop of vanilla ice cream. Makes 12 servings. Store in an airtight container in the refrigerator.

Notes: These apple pie cookies taste good warm, but I think they are even better chilled. These can be made ahead of time and would be a nice treat for dessert, brunch, coffee or tea time. My husband even had one for breakfast with fresh fruit. 

Pinneapple, blueberries, raspberries
& an Apple Pie Oatmeal  Cookie Cup
with homemade whipped cream. 

The texture is a great mixture of oatmeal cookie and apple pie ~ The flavor reminds of of an apple crisp.

Sunday, May 25, 2025

Baked Mashed Potato "Puffs"

This is a simple & delicious way to re-invent
leftover mashed potatoes.

Ingredients:

butter for greasing

2 cups leftover mashed potatoes, cooled

1 cup grated cheddar cheese

1/4 cup finely grated parmesan, asiago or gouda cheese

2 eggs, lightly beaten

1/4 cup sour cream or milk

1 teaspoon dried chives

1/2 teaspoon black pepper

Optional Garnish:

2 tablespoons finely chopped cooked bacon

Method:

Preheat oven to 375*. Use a small amount of butter to grease 9 standard size cups in a muffin pan. Place on a rimmed baking sheet and set aside.

Add the potatoes, cheeses, eggs, sour cream, chives and black pepper to a large bowl. Stir just until all of the ingredients are combined, being careful not to overmix.

Divide the mixture evenly between the greased muffin cups.  Bake for 30 to 40 minutes or until the tops are golden brown and the edges are crispy.

Allow to rest in the pan for a few minutes befroe removing. If desired, sprinkle a few bits of bakon over the top before serving. Makes 4 1/2 to 9 servings.

Notes:

To make 12 potato puffs, use 3 cups potatoes, 1 1/2 cups cheddar cheese, 1 1/2 teaspoons chives, 3/4 teaspoon pepper, 3 eggs, and increase the parmesan cheese and sour cream by 2 tablespoons each.

These mashed potatoes are light and fluffy. They taste a bit like the filling inside of a twice baked potato.


Friday, May 23, 2025

DELICIOUS & HEALTHY Coffee Breakfast Smoothie

This delicious smoothie is a tasty, healthy
 and quick beverage to enjoy for breakfast 
or for an afternoon "pick me up".

Ingredients: 

2 small/medium bananas

1 1/2 cups cold coffee 

1/4 cup peanut butter

4 teaspoons honey

1/2 cup half & half, milk or milk substitute

2 cups ice cubes

Method:

Break the bananas into chunks and place in a blender container. Add the remaining ingredients and process until all of the ingredients are well blended. Makes 2 servings.

Note: This smoothie is a great source of potassium, protein and calcium and it tastes great, too! 

Wednesday, May 21, 2025

The Perfect Grilled Tomahawk Steak!!! (Simple Gourmet/ Keto & Low Carb)

This is the Absolute BEST & Easiest method
for grilling the BEST steak you will ever eat!

Ingredients:

1 (3 pound) tomahawk steak (3 to 4 inches thick)

2 tablespoons coarse ground salt

2 tablespoons salted butter*

2 teaspoons freshly ground black pepper

Method:

Two hours before grilling, remove the steak from the refrigerator and place on a wire rack over a baking sheet with sides. Sprinklr the salt on all sides of the steak and gently rub on the meat. Allow to sit, at room temperature, for two hours.

Preheat your grill for two zone cooking. One side of the grill should be running on high, direct heat and th other side on no heat. (The temperature should be about 275*.) If using a charcoal grill, arrange the coals on one side of the barbecue.

Place the tomahawk on the indirect, low heat side of the grill or the side not over the hot coals. Close the lid and cook for 20 to 30 minutes and then turn over and continue to cook over indirect heat for an additional 20 to 30 minutes or until a meat thermometor measures 120* or "rare". (The amount of time will depend upon how thick your steak is.)**

Next, move the tomahawk over the coals or direct heat side of the grill. Allow to sear for 3 to 5 minutes on each side of the steak with the lid open. (In order to prevent blackening, turn the tomahawk so that the meat is over the direct heat, but the long bone handle is not. 

Return the steak to the wire rack over the baking sheet to rest. Top with the two tablespoons of butter and fresh ground black pepper. Before slicing, allow to rest for 10 to 15 minutes.Serves 4.***

*Regular butter works well, but a blue cheese or herbed butter adds a nice touch. Here is a link to a simple recipe: 

https://carriekitchencreations.blogspot.com/2018/08/keto-friendly-blue-cheese-butter.html

**I used a 3 pound (4 inch thick) tomahawk. It was cooked on a simple  Weber Kettle Charcoal Barbecue over the indirect heat for 1 hour. (30 minutes on each side.) After turning, at 30 minutes, a steak thermometor was inserted in the center of the meat. When the thermometer registered "rare" (or 120*) it was removed and the steak was moved directly over the coals. It was seared for 10 minutes (5 minutes on each side). This produced a PERFECT medium rare tomahawk steak. 

***This steak was very filling ~ depending on your portion size and on what you are serving with it, baked potatoes, salad, bread, etc, one 3 pound tomahawk easily provides 4 to 5 servings.

Notes:

This was my first attempt at cooking this huge piece of meat and it definitely exceeded any expectations ~ my husband and I both agreed that it was the BEST beef we had ever eaten in our entire lives!

I had heard of and seen tomahawk steaks at the market, but had no plans to purchase one until I found one on sale for half price. (Regularly $53.18 marked down to $28.01) For that price, I decided to surprise my husband. (Even though he did the work of manning the barbecue, he thanked me after dinner.) This cut of meat was so amazingly exceptional, that in the future, I hope to find another tomahawk discounted. (I necer pay full price.)

Nutritional info for 1 serving (1/4 of steak), approximately: 288.5 calories ~ 10.5 grams fat ~ .5 grams carbs ~ .5 grams fiber ~ 0 net carbs ~ 23 grams protein

For a low carb meal, I added a simple salad
of sliced avocados, roma tomatoes, white
onions and mini red & orange bell peppers.
(I dressed the salad with lime juice, salt & pepper.)


Monday, May 19, 2025

Refreshing & Simple Lemon Cucumber Water (Healthy, Low Carb & Keto Friendly!)

Super simple and refreshing!

Ingredients:

2 lemons

1 cucumber

8 cups water

Optional Garnishes:

cucumber slices

lemon slices

Method:

Thinly slice the lemons and cucumber. Place them in a large pitcher or divide evenly between two carafes**. Add the water and refrigerate for 2 hours or longer.

Serve over ice and if desired, garnish with a cucumber and/or lemon slice. Enjoy within 48 hours after preparing ~ The flavor from the lemon peels can become bitter the longer the water steeps.

**I prefer a glass pitcher or carafe to a plastic server, for health reasons and taste. I found these Anchor Hocking carafes for $4.47 each at Walmart.

Nutritional info for one cup of Lemon Cucumber Water: 8 calories ~ .1 grams fat ~ 2.2 grams carbs ~ .2 grams fiber ~ 2 grams net carbs ~ .3 grams protein

Notes:

This delicious and refreshing infused water has many health benefits, including:

  • hydration
  • aids digestion
  • boosts energy
  • promotes clearer skin
  • promotes healing
  • promotes muscular health
  • low calorie
  • full of nutrients & antioxidants
  • aids weightloss
Plus, since it tastes good you may drink more water. Enjoy!


Easy Fresh Blueberry Coffee Cake (For Breakfast, Coffee Or Tea Time) 🫖

This simple cake is packed full of blueberries!
It's not overly sweet ~ Serve at room temp or
chilled, plain or with whipped cream & berries.

Ingredients: 

1 tablespoon butter

1 1/2 tablespoons flour

3 eggs, at room temperature

1 cup sugar

1/2 cup (1 stick) unsalted butter, at room temperature

2 tablespoons lemon juice

2 3/4 cup self rising flour**

1/4 teaspoon baking powder

1/2 teaspoon salt

1/4 teaspoon cardamon or nutmeg

2 cups fresh blueberries, rinsed, patted dry with paper towels & stems removed 

2 tablespoons sanding sugar (or regular granulated sugar)

Optional Garnishes:

whipped cream

additional blueberries and/or raspberries

Method:

Preheat oven to 350*. Use 1 tablespoon of butter to grease a 9 inch springform pan or regular cake pan. Add the 1 1/2 tablespoons of flour to the pan. Shake and turn the pan to coat the bottom and sides. Turn the pan upside down over the sink and gently tap to remove any excess flour. Set aside. (If using a regular cake pan, line the bottom with a circle of parchment paper.

In a large bowl, beat the eggs and sugar with an electric mixer at medium speed until they turn a pale yellow color and smooth. Add the butter and lemon juice. Continue to mix until the mixture is smooth.

In a separate bowl, sift together the flour, baking powder, salt and cardamon (or nutmeg). Gradually stir the sifted ingredients into the Butter & egg mixture until all is well blended. (The batter will be thick.)

Spread half of the batter in the bottom of the prepared pan. Gently press 1 1/2 cups of the blueberries on top of the batter. Top with spoonfuls with the remaining batter. Gently smooth the batter over the blueberries. Top with the remaining 1/2 cup of berries and gently press into the dough. Sprinkle the top with sanding sugar. 

Place the cake pan on a baking sheet and place in the preheated oven. Bake for 30 to 50 minutes, or until the cake is golden and a wooden pick inserted in the center comes out clean. (If the cake top is golden brown, and it needs to bake longer, carefully place a piece of foil over the top to prevent burning.

Allow to cool for 20 minutes on a cooling rack before removing the sides of the pan or before inverting to remove from a regular cake pan. Continue to cool for an additional 20 minutes.

Serve at room temperature or chilled. Makes 8 servings. If desired, garnish with whipped cream and additional berries. Store the cake in an airtight container in the refrigerator.

**Regular flour may be substituted for the self rising flour. Use 2 3/4 cups flour and increase the baking powder to 2 1/2 teaspoons.

Notes:

This cake is perfect to serve family and guests for breakfast or brunch, because it can be made ahead of time and stored in the refrigerator until serving.

My husband loved this cake for breakfast, served in a bowl with homemade whipped cream topped with raspberries and sliced strawberries. 


Sunday, May 18, 2025

Fajita Marinade For Baked Or Grilled Chicken

This is a simple, quick and delicious meal
to cook inside or outside.

Ingredients:

3 pounds boneless, skinless chicken breasts

1/2 cup avocado oil

1/4 cup lime juice

2 tablespoons white wine vinegar

2 teaspoons chili powder

1 teaspoon cumin

1/4 teaspoon smoked paprika

2 teaspoons onion powder

4 cloves (4 teaspoons) garlic, minced or pressed

1/2 teaspoon salt

1/4 teaspoon black pepper

Method:

Cut each chicken breasts into 3 long sections. Place in a ziploc bag.

Mix together the remaining ingredients and pour over the chicken. Refrigerate for at least 30 minutes or longer. The uncooked chicken in marinade may be frozen for up to 3 months.

When ready to cook, allow to thaw in the refrigerator overnight.

To Bake: Preheat oven to 400*. Place the chicken and marinade in a lightly greased a baking dish. Bake for 20 to 30 minutes or until the chicked is cooked through. (160*)

To Grill: Heat grill to 400*. Grill for 15 minutes or until cooked through to 160*.

We have an outdoor grill, but sometimes for
 small amounts of meats I use an indoor grill.

Makes 5 to 6 servings.

Serving suggestions: 

Thinly slice 2 bell peppers (of any color) and grill with the chicken.

Serve on top of rice, with warm tortillas, sliced roma tomatoes, sliced avocados, grated cheese, cilantro leaves, salsa and/or a lime wedge.

Notes: This marinade produces a nicely mild flavored chicken. If you like spicy foods, add your favorite salsa to the meal.

I suggest preparing the chicken and marinade and putting it in the frezer. It's nice to have on hand and quick to cook.

My husband loved this meal! 😃

Easy Lean & Green Lime Shrimp Fajitas With Cauliflower Rice


This flavorful, fresh, healthy & delicious
meal is restaurant quality and simple to make! 

Ingredients:

1 pound raw, peeled & de-veined medium shrimp (tails removed)

1/4 teaspoon salt

1/4 teaspoon black pepper

1/4 teaspoon cumin

1/4 teaspoon garlic powder

1/4 teaspoon onion powder

1/4 teaspoon smoked paprika

1 tablespoon lime zest (zest of one lime)

2 tablespoons lime juice (about 1 lime)

6 cups thinly sliced red, yellow and orange bell peppers**

1 tablespoon avocado oil

Accompaniments/ Garnishes:

3 cups cauliflower rice

4 tablespoons fresh cilantro leaves (optional)

2 lime slices cut in half (optional)

1 avocado sliced (optional)

1 cup (4 ounces) shredded reduced fat jack or mozarrela cheese, finely grated (optional)

Method:

If the shrimp are frozen, place in a collander and run cold water over them. Allow to sit for 10 minutes and then rinse with cold water again. Pat dry and place in a medium bowl. Add the chipotle peppers and sprinkle the spices, lime zest and juice over the shrimp. Stir to coat all of the shrimp and set aside.

Heat the oil in an extra large skillet over medium heat. Add the sliced peppers. Stir and cook for 5 to 10 minutes until peppers are tender, but still crisp. Transfer to a plate.

Add the shrimp and liquid to the skillet. Cook the shrimp for 3 minutes on each side, or just until the shrimp turn pink.

Return the peppers to the skillet with the shrimp. Stir gently for a few minutes until all is heated through.

Serve over cauliflower rice. One serving equals 3/4 cup cauliflower rice and 1/4 of the shrimp and pepper mixture. Add your favorite garnishes such as, avocado slices, shredded cheese, fresh cilantro and/or lime wedges. Makes 4 servings.

**My husband and I do not like green bell peppers, so I use only red, yellow and orange peppers in this dish. If you like, green peppers can be added to the measurement the 6 cups of vegetables.

Each serving without garnishes equals: 1/2 leanest serving, 3 green servings, 3/4 healthy fat serving & 2 1/3 condiments 

Each serving with avocado, cilantro, lime wedge & cheese equals: 1/2 leanest serving, 1/4 lean serving, 3 green servings, 7/8 healthy fat serving & 3 condiments

Nutritional info for 1/4 of shrimp and veggies on top of 3/4 cup cauliflower rice (without garnishes), approximately: 199.25 calories ~ 5.9 grams fat ~ 20 grams carbs ~ 4.1 grams fiber ~ 15.9 grams net carbs ~ 19.75 grams protein

Nutritional info for 1/4 of shrimp and veggies on top of 3/4 cup cauliflower rice with 3/4 ounce of an avocado, 1/4 cup of cheese, 1/2 slice of lime and 1 tablespoon cilantro leaves, approximately: 292.25 calories ~ 11 grams fat ~ 25.8 grams carbs ~ 6.5 grams fiber ~ 19.3 net carbs ~ 27.35 grams protein

I love shrimp fajitas and this Lean & Green meal is one of my favorites!  

Saturday, May 17, 2025

Easy Low Carb Chipotle & Lime Shrimp With Cauliflower Rice (Keto & Paleo)

This colorful, fresh & flavorful meal is 
simple to make and restaurant quality! 

Ingredients:

1 pound raw, peeled & de-veined medium shrimp (tails removed)

1 tablespoon chopped chipotle peppers in adobo sauce

1/4 to 1/2 teaspoon salt

1/4 to 1/2 teaspoon black pepper

1/4 teaspoon cumin

1/4 teaspoon garlic powder

1/4 teaspoon onion powder

1/4 teaspoon smoked paprika

1 tablespoon lime zest (zest of one lime)

2 tablespoons lime juice (about 1 lime)

6 cups thinly sliced red, yellow and orange bell peppers**

2 teaspoons avocado oil

2 teaspoons butter

Accompaniments/ Garnishes:

2 cups cauliflower rice

fresh cilantro leaves (optional)

lime wedges (optional)

1 avocado sliced (optional)

1 roma tomato sliced (optional)

guacamole (optional)

1/2 - 1 cup salsa (optional)

1 cup (4 ounces) shredded jack, cassera or mozarrela cheese, finely grated (optional)

1/2 cup sour cream sour cream (optional)

Method:

If the shrimp are frozen, place in a collander and run cold water over them. Allow to sit for 10 minutes and then rinse with cold water again. Pat dry and place in a medium bowl. Add the chipotle peppers and sprinkle the spices, lime zest and juice over the shrimp. Stir to coat all of the shrimp and set aside.

Heat the oil in an extra large skillet over medium heat. Add the sliced peppers. Stir and cook for 5 to 10 minutes until peppers are tender, but still crisp. Transfer to a plate.

Heat the butter in the skillet. Add the shrimp and liquid to the skillet. Cook the shrimp for 3 minutes on each side, or just until the shrimp turn pink.

Return the peppers to the skillet with the shrimp. Stir gently for a few minutes until all is heated through.

Serve over cauliflower rice. Add your favorite garnishes such as, avocado slices, tomato slices, shredded cheese, guacamole, salsa, sour cream, fresh cilantro and/or lime wedges. Makes 4 servings.

**My husband and I do not like green bell peppers, so I use only red, yellow and orange peppers in this dish. If you like, green peppers can be added to the measurement the 6 cups of vegetables.

Nutritional info for 1/4 of shrimp and veggies on top of 1/2 cup cauliflower rice (without garnishes), approximately: 196 calories ~ 6 grams fat ~ 19.2 grams carbs ~ 3.7 grams fiber ~ 15.5 grams net carbs ~ 18.7 grams protein

Nutritional info for 1/4 of shrimp and veggies on top of 1/2 cup cauliflower rice with 1/4 of an avocado, 1/4 of a tomato, 1/4 cup of cheese and 2 tablespoons sour cream, approximately: 476 calories ~ 29.3 grams fat ~ 30 grams carbs ~ 8.2 grams fiber ~ 21.8 net carbs ~ 28.4 grams protein

I love shrimp fajitas and this meal reminds me of  my favorite restaurant version, at "Chilitos",  for a fraction of the price!  


Easy Chipotle & Lime Shrimp Fajitas

This flavorful, fresh, healthy & delicious
meal is restaurant quality and simple to make! 

Ingredients:

1 pound raw, peeled & de-veined medium shrimp (tails removed)

1 tablespoon chopped chipotle peppers in adobo sauce

1/4 to 1/2 teaspoon salt

1/4 to 1/2 teaspoon black pepper

1/4 teaspoon cumin

1/4 teaspoon garlic powder

1/4 teaspoon onion powder

1/4 teaspoon smoked paprika

1 tablespoon lime zest (zest of one lime)

2 tablespoons lime juice (about 1 lime)

6 cups thinly sliced red, yellow and orange bell peppers**

2 teaspoons avocado oil

2 teaspoons butter

Accompaniments/ Garnishes:

warm small flour or corn tortillas

rice (optional)

fresh cilantro leaves (optional)

lime wedges (optional)

avocado slices (optional)

tomato slices (optional)

guacamole (optional)

salsa (optional)

shredded jack, cassera or mozarrela cheese, finely grated (optional)

sour cream (optional)

Method:

If the shrimp are frozen, place in a collander and run cold water over them. Allow to sit for 10 minutes and then rinse with cold water again. Pat dry and place in a medium bowl. Add the chipotle peppers and sprinkle the spices, lime zest and juice over the shrimp. Stir to coat all of the shrimp and set aside.

Heat the oil in an extra large skillet over medium heat. Add the sliced peppers. Stir and cook for 5 to 10 minutes until peppers are tender, but still crisp. Transfer to a plate.

Heat the butter in the skillet. Add the shrimp and liquid to the skillet. Cook the shrimp for 3 minutes on each side, or just until the shrimp turn pink.

Return the peppers to the skillet with the shrimp. Stir gently for a few minutes until all is heated through.

If desired, serve over rice and/or with warm tortillas. Add your favorite garnishes such as, avocado slices, tomato slices, shredded cheese, guacamole, salsa, sour cream, fresh cilantro and/or lime wedges. Makes 4 servings.

**My husband and I do not like green bell peppers or cooked cooked onions as a garnish, so I use only red, yellow and orange peppers in this dish. If you like, sliced onions and green peppers can be added to the measurement the 6 cups of vegetables.

Notes:

To reheat leftovers, place a few tortillas on a plate and top with a small portion of shrimp and vegetables. Heat in a microwave oven for 1 minute. 

I love shrimp fajitas and this meal reminds me of  my favorite restaurant version, at "Chilitos",  for a fraction of the price!  


Tuesday, May 13, 2025

Bunny & Flower Sugar Drop Cookies (For Easter, Baby & Bridal Showers And Tea Parties)

These simple & tasty sugar cookies can
be made without the candy decorations,
but they are so pretty & festive with
the pastel M&Ms. 
🩷🩵💜💚💛

Ingredients:

1 cup (2 sticks) salted butter

1 1/3 cups sugar

1 egg

2 teaspoons pure vanilla extract

2 1/2 cups flour

1/2 teaspoon baking soda

1/2 teaspoon baking powder

1/4 teaspoon salt

additional granulated sugar

10 ounces (about 1 1/4 cups) pastel M&M candies**

Method:

In a large bowl, use an electric mixer to beat together the butter and sugar for 3 to 4 minutes until light and fluffy. (Scrape down the sides as needed.)

Add the egg and vanilla and continue to mix for an additional 2 minutes. Scrape down the sides of the bowl again.

Sift the flour, soda, baking powder and salt together in a second bowl. Add the sifted ingredients to the creamed ingredients. Mix on low until all of the ingredients are fully combined.

Refrigerate the dough for 30 minutes or longer.

Preheat oven to 350* Line baking sheets with parchment paper and lightly grease with butter or cooking spray.

Scoop 2 tablespoons of cookie dough and form into a ball. Roll in a small bowl of granulated sugar and place 2 inches apart on the prepared baking sheets.

Bake for 1o to 11 minutes. (The cookies should not be brown on top or around the edges.) As soon as the cookies come out of the oven, decocorate with the M&M candies.*** Gently push 1 candy face down for each bunny body. Gently postion 2 candies, on their sides, above each body to make the ears. (Decorate each cookie with 2 bunnies.) Or, place one M&M in the center of each cookie and surround with 6 more candies to make a flower.

Allow the cookies to cool for 5 minutes on the baking sheet before transferring to a wire rack to finish cooling completely. Store in an airtight container, in the refrigerator, with sheets of waxed paper in between layers of cookies. Makes 3 1/2 dozen cookies.

**Before the Easter holiday, you can find pastel M&Ms at many grocery stores. I have found giant bags for $15, but they also sell much lower priced bags of individually wrapped pastel candies to use for Easter Egg hunts. One of those bags contains enough candies to decorate 3 1/2 dozen cookies. I like to purchase a bag or two, to store in the refrigerator, so that I have them on hand for baking.

***Immediately press the candies into the cookies when they come out of the oven so that they stick. If you are decorating the cookies with M&Ms, only bake 6 cookies at a time. If you are not decorating with M&Ms, 12 cookies can be placed on each baking sheet.

Notes: 

These simple "drop" sugar cookies are very tasty on their own and could be rolled in different colored sugars for holidays, school or team colors.

My husband was skeptical before he tasted these cookies because he wasn't certain he would like the texture of the cookies. He loved them!


Sunday, May 11, 2025

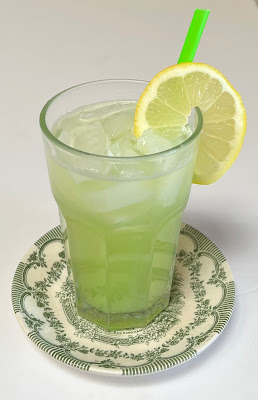
Refreshing Cucumber Lemonade (With Sugar Free Option)

This is a simple, healthy & 
refreshing thirst quenching drink!

Ingredients:

2 large cucumbers

1 cup fresh lemon juice**

1/2 cup Lakanto Monkfruit sweetener, honey or sugar (or more to taste)

4 cups cold water

ice

lemon slices, optional

cucumber slices, optional

Method:

Peel and chop the cucumbers. Add to a blender and process until the cucumbers are pureed and smooth.

Place a sieve overa pitcher or 8 cup liquid measuring cup. Transfer the cucumber puree to the sieve and allow the liquid to drain into the pitcher below. (You may need to gently stir to get all of the juice through the sieve.)***

Stir in the lemon juice and sweetener until well combined. Stir in the cold water.

Pour over a glass filled with ice cubes and enjoy. Makes 7 cups of lemonade. Store in the refrigerator.

**I purchase bags of lemons, juice them and freeze the juice in ice cube trays. Once frozen, I transfer to large ziploc bags so that I always have fresh lemon juice when needed.

***You can toss the pulp, but I made ice cubes from the pulp to add to fruit smoothies.

Notes:

Cucumber Lemonade is  a refreshing and flavorful alternative to sugary beverages that provides a boost of vitamins and antioxidants.

Cucumber has a high water content that aids in hydration and lemon juice provides vitamin C that can stimulate bile production that helps with digestion.

Along with the health benefits of hydration and digestion support, drinking cucumber lemonade has potential to help with weight loss/management because of the increased fluids and because some (like myself) find that it helps satisfy hunger cravings.


Southwestern Chicken Crescent Roll Bake

Comfort food with a Southwestern twist!

Ingredients:

1 (12.5 ounce) can chunk chicken breast with rib meat (or 1 1/2 cups finely chopped or shredded cooked chicken breast)*

1/2 cup (2 ounces) cheddar cheese

1/2 cup (2 ounces) jack or mozarella cheese

1 (4 ounce) can diced green chiles, drained

1/2 cup mayonnaise

1 envelope taco seasonng mix (or, homemade mix)**

2 Roma tomatoes

1 lime

2/3 cup finely crushed tortilla chips

2 (8 ounce) packages refrigerated crescent roll dough

Optional Garnishes:

salsa

guacamole

sour cream

Method:

Preheat oven to 375*.  Set out a large pizza stone or large baking sheet. (If using a baking sheet, line with parchment paper.

Chop or shred the chicken and add to a mixing bowl. Add the cheeses, chiles and mayonnaise and taco seasoning. Stir to mix.

Cut one of the tomatoes in half. Scoop out the seeds and discard. Dice the remaining tomato and add to the mixing bowl. Cut the lime in half. Juice half of the lime. Add one teaspoon of lime huice to the mixing bowl.

Set aside 2 tablespoons of the crushed tortilla chips. Add the remaining chips to the mixing bowl.  Stir until all of the ingredients are well mixed. Set aside.

Sprinkle the 2 tablespoons on chips on a large cutting board or waxed paper lined countertop. Open and unroll the packages of dough. Lay the rectangles of dough on top of the crushed chips, pressing the dough lightly into the chips. (You want the chips to stick to the dough.)

Separate the dough into triangles. Arrange the triangles, chips side down, in a circle on the pizza stone or baking sheet. The large sides of the triangles should overlap forming a 5 inch diameter circle in the center of the stone with the points facing the outer edge of the stone.


Scoop or form the chicken filling in a ring on the widest end of each triangle. Fold the points over the filling and tuck under the wide ends of the dough in the center of the ring. (The filling will not be completely covered.)


Bake for about 23 minutes or until the crust is golden brown. While the ring is baking, slice the remaining tomato into 8 wedges. Cut the remaining lime into 4 slices. Cut the slices in half.

After the ring has finished baking, arrange the tomato wedges and lime slices alternately in the openings in between the crescent roll crust. If desired, garnish or serve with salsa, quacamole and/or sour cream. Makes 8 servings.

*I used canned chicken, because I had a can in my pantry that I wanted to use.

**I make my own chemical free taco seasoning. Here is the link to the super simple mix: 

https://carriekitchencreations.blogspot.com/2016/03/homemade-taco-seasoning.html


Note: My husband was very skeptical and actually looked sad when I placed this plate in front of him 😞 but, after he tasted the meal, he enjoyed it! He even asked to have it for dinner again the next night. 😁